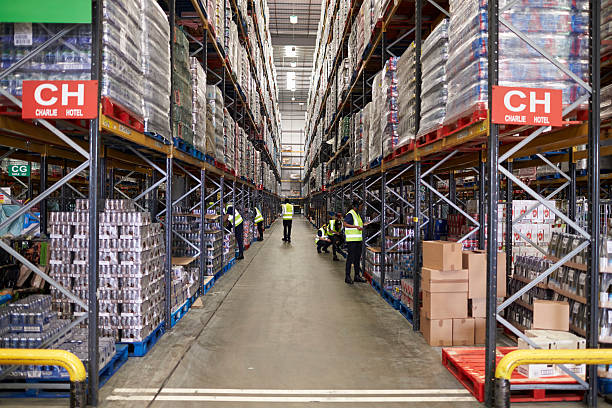
Most people pick racking the way they’d pick furniture: by what looks right and what the catalog says it holds. Then the system goes into a building with awkward columns, dock doors in the wrong places, and a sprinkler layout nobody checked, and the problems start. Choosing the right pallet racking systems works better when you treat the building as the starting point, not an afterthought.
Start With the Building You Actually Have
Every warehouse has constraints that shape what’s possible. Clear height, column spacing, floor condition, dock positions, and the location of offices and mechanical rooms all limit where racking can go and how it can be arranged.
Walk the space with a tape measure and a critical eye. Drawings are often out of date, and a few inches of difference in a bay width or ceiling height can change how many pallet positions you actually get.
Capture the odd features as well. Slab joints, drains, support posts, and low-hanging pipes seem minor until an installer discovers they sit exactly where an upright is supposed to go.
Flow Pattern Decides Where Racking Goes
How product moves through the building should drive the layout. In a through-flow design, goods enter at one end and leave at the other, while a U-flow design keeps receiving and shipping on the same side, and each puts different demands on your racking.
Through-flow layouts suit operations with high volume and strict first-in, first-out needs. U-flow setups save on dock infrastructure and are easier to supervise, but they can create congestion at the shared side if traffic isn’t managed carefully.
Draw the travel paths before choosing a rack type. If forklifts have to cross each other’s routes constantly, the layout is working against you, no matter how much storage it offers.
Column Spacing Sets Your Bay Sizes
Columns are the fixed points everything else has to respect. Racking bays are modular, but the grid of columns in the building determines how well those modules fit, and a poor match wastes space or forces custom configurations.
Standard pallet racking systems typically work in repeating bay widths, so look for column spacing that divides neatly into those. Spacing that doesn’t match can leave awkward gaps that are too small to use and too large to ignore.
Sometimes the answer is to ignore the columns and rack around them. Industrial racking systems can be arranged to incorporate or skip column positions, but this takes planning, and it’s much easier to do on paper than after steel is delivered.
Dock Positions and Staging Space
Racking close to the docks speeds up put-away and shipping, but it also competes with staging areas. Without enough open floor near the doors, pallets pile up in aisles and the organized layout falls apart within weeks.
Leave room for receiving, inspection, and outbound staging. A common mistake is racking every available foot of space and then discovering that trucks can’t be unloaded or loaded efficiently.
Many operators bring in design build construction support when they’re adding docks or adjusting door positions alongside a racking project. Coordinating the building changes with the storage plan prevents situations where a new door lands behind a row of freshly installed uprights.
Clear Height and Fire Protection
Vertical space is the cheapest storage you’ll ever get, but it comes with rules. Racking height is limited by ceiling clearance, sprinkler locations, and the fire code, and the requirements get stricter as you stack higher.
In-rack sprinklers, flue spaces, and clearance below the sprinkler heads all affect how many levels you can use. Plan these details at the layout stage, because adding suppression after the racking is up is expensive and disruptive. Ask for the fire protection analysis in writing, since the person approving your permit will want to see it anyway.
Check structural limits too. Roof trusses, mezzanines, and building services can restrict how tall you can build, and an honest survey avoids designs that look great but can’t be permitted.
Aisle Width Depends on Your Equipment
Aisle width is a trade between density and handling speed. Narrow aisles pack in more pallets but require specialized trucks and slower maneuvering, while wide aisles allow standard forklifts and faster movement at the cost of storage capacity.
Match the aisle to the equipment you’ll really operate. If your team uses counterbalance trucks, a narrow-aisle layout won’t work without a fleet change, and that cost should be part of the decision. Test a mock aisle with your real trucks and loaded pallets if you can, since measurements on paper rarely capture how tight a turn feels.
Think about future equipment too. If you may add automation or guided vehicles later, design aisles and floor tolerances that will support them, so you aren’t tearing out racking in a few years.
Match Rack Type to Each Zone
A single warehouse often needs more than one kind of racking. Fast-moving SKUs may belong in selective racking for quick access, while bulk goods with few SKUs can go in drive-in or push-back systems that use space more efficiently.
Zoning your layout this way lets each part of the building do what it does best. Warehouse Racking Solutions that blend several rack types usually outperform one-size-fits-all designs, because they reflect how products really move.
Be careful at the boundaries. Transitions between zones affect traffic and inventory flow, so check that forklifts can move between them without bottlenecks or awkward turns.
Plan for Change Before You Install
Operations evolve, and layouts that fit perfectly today can become obstacles in three years. New product lines, different pallet sizes, or automation projects can all demand a different arrangement.
Leave room for future adjustments. Choose a Warehouse Racking System with adjustable beams and standardized components, and keep some open floor in reserve, because flexibility costs little upfront and a lot later.
If you’d like a second opinion on how your building should shape your racking plan, reach out to us and we can review your drawings, flow, and equipment before you place an order. An hour of review now can prevent a layout mistake that would otherwise stay bolted to the floor for a decade.
Keep the Layout Honest After Installation
A good layout can erode quickly. Pallets creep into aisles, temporary storage becomes permanent, and the original traffic patterns quietly disappear. Photograph the floor each quarter and keep the images next to the layout drawing, so changes become obvious instead of gradual.
Walk the floor regularly and compare it against the plan. When the layout drifts, find out why, because the cause is often a real operational need that the original design missed.